Showing posts with label exposure. Show all posts

Friday, May 6, 2011

Light Meter

Light Meter  -----   Metering  ----- Exposure Bias  -----  Thinking Like Your Camera  -----  Thinking Beyond Your Camera

LIGHT METER -
Simply put, the light meter in your camera determines how much light is going to look correctly exposed. It then makes decisions based upon that information. In Program Mode, it sets the aperture (fstop) and the shutter speed -how big the window opens and how long it opens.
METERING -
The light meter can be pin-pointed to the very center of your frame (called Spot Metering), it can consider the entire frame (Matrix metering), or somewhere in between (called center-weighted).
Spot metering is nice because you can point your camera to the very spot you want exposed correctly, press half way down (or lock the exposure) and then compose your shot and fire.  Matrix metering considers the whole picture and tries to find an exposure that will produce the bets results.

EXPOSURE BIAS -
Most cameras have an exposure bias.
 That means you can tell it to under compensate or over compensate. Why would you want this? Well, what if you find that you just like lighter pictures all around. Then change your exposure bias up a few steps.


THINKING LIKE YOUR CAMERA -
In order to correctly expose your image (especially your subject) - you need to think like your camera.  Think correctly expose each part of your image... the background, the foreground, the subject, the highlights, the lowlights.  You get one image that combines all of that... the trick is to keep it simple enough to be aesthetic.

THINKING BEYOND YOUR CAMERA -
Landscapes and still life allow us to make multiple images taken at different settings (multiple exposures) and  then combined them using software  -- HDR.
For person shots -portraits, weddings, etc - we don't have that luxury.  Here's a short video from a wedding photographer named Cliff Mautner.  Here he is talking about using a kicker flash.  But note that he talks about using an exposure bias (I think he speaks in terms shooting 1.5 to 2 stops below his ambient light reading).


Finally, thinking beyond your camera. In Cliff's work, he does a lot of work with flash and/or directional lighting. In order to emphasize that single light source, he underexposes the rest of the shot. So he probably meters on something that he wants to underexpose... he has his exposure bias set down a stop or two -- he then sets the fstop and shutter speed manually to match that meter reading (most likely on spot metering or center weighted) -- then he kicks in a flash or has the window light do the highlighting for him. This is called low-key lighting, where the overall image is dark. Notice how your eye is led right to the highlighted areas.

So, I tried this myself one time with limited success:

So the Pic of the Day is going to have to be Scotty... because he's 3 today.  Happy Birthday Champ!

Tuesday, May 3, 2011

baby steps continued

So yesterday was a review of the first 3 steps based upon a few conditions --- how close is my subject (lens), how much light do I have to work with (ISO), and do I want to add light (flash).

The next step is where there can be a lot of variability. Select a mode to shoot with. Do I choose to shoot in P (program mode), A (aperture priority), S (shutter priority), or M (manual).  Let's dive into these modes.

If I want the camera to decide what settings to use, I choose P mode.  I can probably count the number of times I have used P mode in the last year on one hand.  But if we go back 12 years ago to my first SLR camera, I was in P mode virtually all the time.  So I think of P mode as a great option for beginners.  And for the more seasoned photographer, you can use P mode when you have a situation where you really need to get a picture fast and don't have time to think.  This mode determines what f stop and what shutter speed.  And if you have your camera in AUTO ISO, it will also determine what ISO to use.

Moving on... If I know my depth of focus, but don't want to concern myself with the shutter speed, I will choose A mode (aperture priority).  This allows me to select the f-stop and then have the camera decide how long the shutter will be open based upon that need.  I decide this based on two criteria... what depth of focus do I want and how much light to I have to work with.  Opening the f-stop wider (smaller numbers like 1.4, 2.8, 3.5) lets more light in my lens but also decreases the depth of field (or focus depth).  They are sometimes referred to as shallow focus and deep focus.

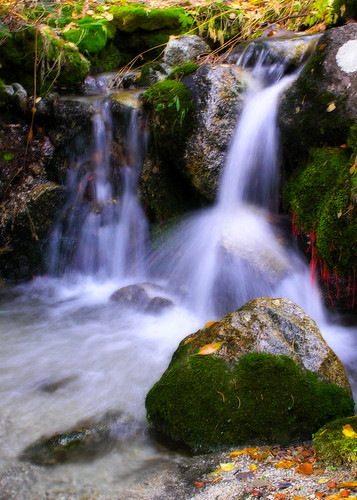
I make more decisions based upon focus depth rather than shutter speed, probably because I am taking more portraits.  So for me, S mode is only rarely used.  The exception is when I care about working with the motion of a scene.  For example, water falls tend to look much more aesthetic when the water is flowing.  In order to capture that, the exposure needs to be open longer (longer shutter speed).  In this image, taken with my old Olympus point and shoot camera, I put the camera in S mode and chose a shutter speed of 1/3 (which is to say .333 seconds).

Finally M mode, or manual.  I won't spend much time here in this post, but I do spend probably 60-80% of my time shooting in this mode.  When you find a style that works for you, when you want full control of the camera, or when you are shooting with a flash or two or three, M mode can really give you control of everything, especially your lighting.

CASE STUDY:
My youngest child is playing in his room.  There is diffuse light coming in from the window, so the lights in the room are off.  Let's go through the steps so far...
I know I want to do a close up, because for me with infants, I want to capture their expressions and the details thereof.  So I keep my 24-70mm lens on and I will play around with the zoom, probably between 40-70 will be what I shoot.  I am thinking higher ISO because the light from the window is my only source of light and the room light (ambient light) is very dim.  So I try ISO 800. I could try as high as 1600, but 800 is where I stop.  Finally, should I use a flash or not?  The flash would fill the background with some light and make the room look more evenly brighter.  But I decide I want to have the directional lighting the window is going to provide and I don't want to mess around with multiple sources of light... just the one window light.  So no flash.  I know that this is a potentially moving subject, so I put it in A mode and play around with the f-stop.  5.6, 4.0, 3.2.  I am doing this while pointing my camera at the subject so that the correct shutter speed is selected by my camera.  I see 250 (which is 1/250th of a second).  This is plenty of speed to stop the movement and create a sharp image.  So I snap a few shots...
If you look closely, you can see the window in his eyes.  This use of single light source creates some good dimension with lighter on his left side of face and darker on his right side of face.  In addition, the background is less exposed than he is because he is closer to the light source (the window).  This helps him stand out.  My focal length is 70mm (zoomed in on this lens).  With the help of my online DOF calculator, I can see that my focal length is about 3.5 inches (more on this later).

Tomorrow: more talk about the light meter in your camera and making your camera see what you see.

Pic of the Day:

Tuesday, January 25, 2011

back to the basics - with a point and shoot

So I decided I would take our little point and shoot out to work... maybe this will be a regular occurrence. At any rate, I wanted to see what I could capture on it.

So I stopped at Walmart on the way to work to look for a spice that it frankly a little hard to find. As I turned into the parking lot, I noticed the sun kissing the top of the mountains to the West. So I stopped in the parking lot. Granted, the foreground is not very aesthetic; but it is what it is. Honestly, it seems like half of the roads in Utah are under construction (but I won't get started with that).

Back to the picture. I am shooting in P (program mode) which is the next closest thing to Auto.
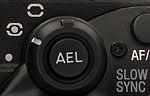
My thoughts are this... I want it to be a little under exposed so that the light hitting the mountain will be exposed, not the surroundings. So I changed my exposure bias down to -2/3. Did you know you could do that? Tell your point and shoot to underexpose? Yep. My exposure button is a little +/- in a square (button). I push that and I have the chance to overexpose or underexpose my shot.

Next I want to make sure that my ISO is on 100. Due to this being a point and shoot, pictures above 200 ISO, especially underexposed shots, turn out really grainy and the colors are noisy. So ISO 100 I was willing to maintain. [the only time I would dare go higher than ISO 400 on this point and shoot is in sufficient lighting and I just want the shutter speed to be faster]

Oh, and my flash is on Force-Flash OFF mode (I don't know if this makes any difference, but I think it does).

Finally as I compose my picture and press half way down, it tells me in the display what shutter speed it has chosen. This was 1/60 of a second. This is quick enough to be handheld, but I need to make sure that when I press that shutter, I don't move the camera. A big problem with small point and shoot cameras is that when you press the shutter, the camera has movement, and thus blurry photos if the shutter speed is slow.
As a general rule, if you are slower than 1/60 of a second, brace your camera on something solid, like a tree, a car, or even a tripod.
Well, enough of the talk. Here are the shots.

Here is a crop of the first image...

Wednesday, June 3, 2009

Analyzing and learning

So, probably no one reads this anymore... I know I don't. But I thought I would sit down with no one and analyze some pictures that were really quite noteworthy and talk about what I like about them and why, in addition to how they might have set up the shots, technically and otherwise. Let's get on with it... by the way.. these shots were taken from the website of David Copperfield's Cay in the Bahamas. Obviously catering to the high-end consumers.


This shot is about light and perspective. It says, you are sitting here looking out the window enjoying a perfectly exposed evening dinner on the dock.

LIGHT
I have two settings (speaking of exposure) to think about. I obviously have a strobe (flash) or two camera left aimed at the people on the dock. And I have ambient light (in the room and the water/sky combo). Actually, there may be a strobe in the room as well on a very low setting... let's forget there is one if so.

EXPOSURE
I expose for the ambient light (manual exposure) minus 1.5 stops so that the room and water/sky maintain their evening appeal and allow my subject to be correctly exposed and be the focal point. I want to use an f stop that is going to allow my foreground and my background to be in focus, so f8 possibly. Remember the smaller my aperture (bigger fstop #) the harder my flash has to output to give me the same brightness. So this is a compromise between a small fstop for flash but big enough to keep my background island, my people, and my window ledge all crisp.

IMPROVE
can I improve on this image? Sure... try using one more flash from the right or from above the dock to eliminate some of those harsh dock shadows.
But I wouldn't have taken the flash out to the subjects, or I wouldn't have brought the viewer to the subject.

SETTING
A couple of nice things are my lines in this shot. The consistent horizon lines made by the window pane and ocean line are settling. But the curtain really frames my subject well and the diagonal lines of the dock point me directly to my subjects, which are of course not smack dab in the middle of my shot, but skewed to the right and upper middle of my shot. So well established lines, great balance, and quite decent lighting.

ONE MORE COMMENT
This picture, believe it or not, could have been taken in the daytime... it's not highly likely, but possible. First, why would I want to do that when I could just wait for this perfect dusk lighting? Answer- because dusk lighting only lasts for a few minutes to an hour. That can be a very short window to get the shot set, exposed for and taken. How would I create it in the daytime? Shoot with the white balance set to Tungsten and use a warming gel on the camera. That way you get the bluish look to the ambient light while maintaining correct color on your subject.

So this is longer than I thought it would be... let's just do one more for now...


In this image we also have multiple lighting. We have the ambient light outside where our pool model is really showing off ad we have the indoor lighting including the man in gray shirt. So where is my light source? Well, one is coming from camera right (casting a shadow on gray shirt man's back and lighting front girl's hair). But we also have a light on camera left to light the statues above and front man's shirt and back of head). We again have to set our exposure for the the light we don't control (the sunlight and pool area) and then match that exposure with the lighting on the inside of the covered patio.

I like the vignetting we get from the dark back of the couch and darker parts of the ceiling. But I probably would have softened my light with an umbrella or gobo so that my subjects up front weren't so contrasty (lights and darks are quite prevalent on them).

That's all for now.

Oh, one other note: the first shot was set at a fairly long exposure... so it was probably an evening shot. Can tell this by the fire on the lanterns moving a lot. The second shot was relatively fast shutter speed because the water ripples are frozen in time. Just a thought on what the ambient manual exposures might have been on.