
So what steps do I take? Today, I will start with the first three. Forgive me if I leave out any steps... this is the first time I have really thought about what I do step by step.
1) Decide which lens to shoot with. Most of the time, I leave the 24-70mm lens on... esp for indoor shots and outdoor landscapes. If I am shooting portraits outdoor with more room to shoot or I want to grab some real detail, I grab the 70-200mm. And on some occasions, I will grab the 300mm. These are all fixed aperture lenses (f2.8). If you have a lens with variable f-stop (kit lenses that come with many cameras) no problem - I will address this in the next post
NOTE: Steps 2 and 3 are quite simultaneous
2) Turn on the camera and check the ISO. If I am shooting low light, I will push it up to between 1250 and 2000. If I am out of doors it will be set at 200 or lower. And then you have the in between 400-800 where there is sufficient light indoors, but you are shooting a subject that will be moving quite a bit.
3) I decide whether or not to use a flash. The flash will help highlight my subject, create ambient light, or act as a filler for shadows in the outdoor shots. (Here I also decide whether or not I will grab a second flash to be off-camera)
Oh yah, this is a good time to take off the lens cap so I can move on to the next few steps...
...to be continued...
If you are ready for more of the WHY behind these steps, I have added some additional information here:
Step 1: lenses... my subject matter and my depth of field are the two major deciding factors for lens selection. In general, for shooting landscapes (including skies) I want wide angle. At times, it would be ok to do a single portrait at something less than 35mm. Remember that distortion on portraits is generally not very flattering. Wide angle gives me large depth of field, so my focus will be infinite most of the time. As I go longer on my lens (higher mm or ZOOM), the shorter my depth of field or focus will be. Remember the calculation considers distance to subject, fstop, and mm of lens (remember to consider crop factor).
Step 2: the ISO. The reason I choose the ISO first is that it is the canvas of the image. If an oil painter used a napkin to paint on, the results would be sub-par at best... Same with a photographer shooting ISO 64000 on a little point and shoot camera. ISO 200 on an upper end camera is more like a proper canvas. The graininess of the image (or pixelation) is determined by the quality of canvas. Thus, with the newer cameras, they are, in this analogy, trying to make the smaller canvases work like larger or higher quality canvas material so that you can push the ISO more and more with better results. The size of the sensor is the major determinant in the quality of the image, especially as you begin to shoot in lower light and push the ISO higher. The challenge for camera companies is to have the processors (computers) in the newer cameras do more with less light (thus achieving higher quality images and less noise with the same size sensor).
Step 3: to flash or not to flash - and to flash on camera only, or off camera as well - this is where we get into the exposure, style, multiple light sources, and much much more... so this is much to large to define here.
LINKS
IMAGE of INTEREST (Pic of the Day)
Tough image to expose correctly. Well done with the fill flash. Obviously off camera flash.
Shot at 48mm, f8.0 at 1/320 at ISO 400
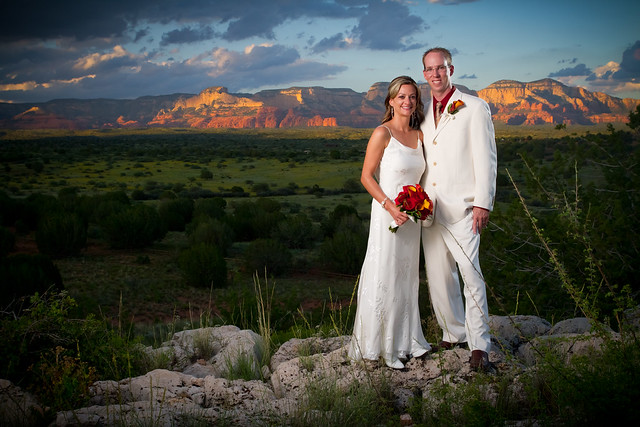
From the photographers notes:
Lighting -
Alienbee AB1600, camera-left just out of the frame at 1/8 power into large softbox that was threatening to take off like a sail, and would've gone over the cliff that the b/g were standing on if not for an assistant with cat-like reflexes.
Bare Vivitar 283 at 1/16 power camera-right and behind couple.
No comments:
Post a Comment